1. float 속성
<style>
	img {
		float: left;
		margin-right: 20px;
	}
</style>
</head>
<body>
	<h1 style="text-align: center;">float</h1>
	<p><img src="image.jpg" alt="flower" width="245" height="185">
	float 속성은 해당 HTML 요소가 주변의 다른 요소들과 자연스럽게 어울리도록 만들어준다.<br>
    현재는 웹 페이지의 레이아웃(layout)을 작성할 때 자주 사용된다. <div class=""></div></p>
</body>
더보기

이미지와 글자가 자연스럽게 출력됨.
- float 속성은 해당 HTML 요소가 주변의 다른 요소들과 자연스럽게 어울리도록 할 때 사용한다.
2. clear 속성
<html style="width: 500px; height: 500px;">
<style>
    .left {
        border: solid 1px black;
        width: 150px; height: 80px;
        float: left;
    }
    .right {
        border: solid 1px black;
        width: 150px; height: 80px;
        float: right;
    }
</style>
<body>
    <h1>clear</h1>
    <div>
        <div class="left">left</div>
        <div class="right">right</div>
    </div>
    <p>clear 미적용</p>
</body>
</html>
더보기
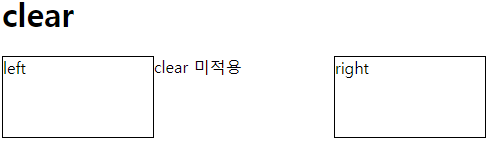
clear 적용 전
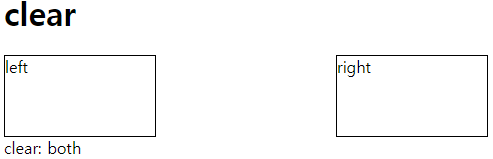
clear 적용 후
- float의 성질을 차단한다.
- both: 양쪽 요소에 있는 성질을 차단한다.
left : 왼쪽 요소에 있는 성질을 차단한다.
right: 오른쪽 요소에 있는 성질을 차단한다.
3. overflow
<style>
    div {
        border: solid 1px black;

    }
    img {float: left;}
    .overflow {overflow: auto;}
</style>
<body>
    <h1>overflow</h1>
    <div>
        <div class="overflow"> 주어진 공간을 넘어가는 content를 어떻게 보여줄지 제어한다.
            <img src="tistory.jfif" width="250px" height="150px">
        </div>
    </div>
</body>
더보기
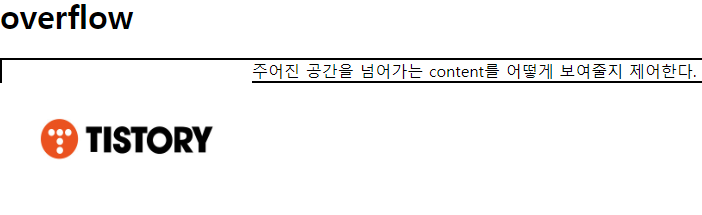
이미지와 내용이 겹쳐져있다.
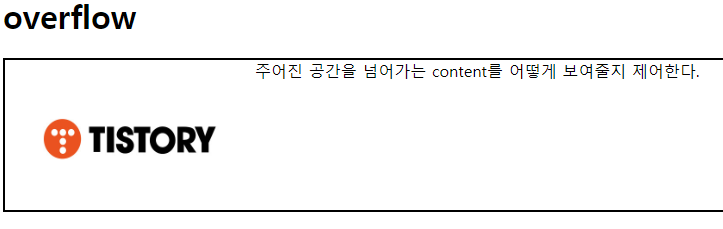
overflow: auto로 지정할 경우 자동으로 크기가 조절된다.
- 해당 요소가 주어진 공간을 넘어갈 경우 content를 어떻게 보여줄지 설정한다.
'FrontEnd > Css' 카테고리의 다른 글
| [CSS] 의사 요소(pseudo-element) (0) | 2021.07.31 |
|---|---|
| [CSS] 구조 의사 클래스(structural pseudo-class) (0) | 2021.07.30 |
| [CSS] position, z-index (0) | 2021.07.29 |
| [CSS] display, visibility, opacity (0) | 2021.07.27 |
| [CSS] 아웃라인(outline) (0) | 2021.07.27 |